Knowledgebase settings
The Sympoq Knowledgebase is a helpful tool that allows you to create and organize a collection of articles and frequently asked questions. All registered users can easily browse through these articles or search for specific information using keywords or questions they have.
Depending on how you set access permissions, you can create three different types of knowledgebases and decide which users can see each one.
- Internal - Internal team members (support agents)
- Customer - Registered customers from selected customer groups
- Public - Guest (anonymous) users and portal visitors.
Categories
Knowledgebase categories help organize all articles into a structured repository with various groups of information. Access permissions for each category determine whether users can access that category and all associated articles.
The categories table available in Settings > Knowledgebase > Categories section represents a list of categories.
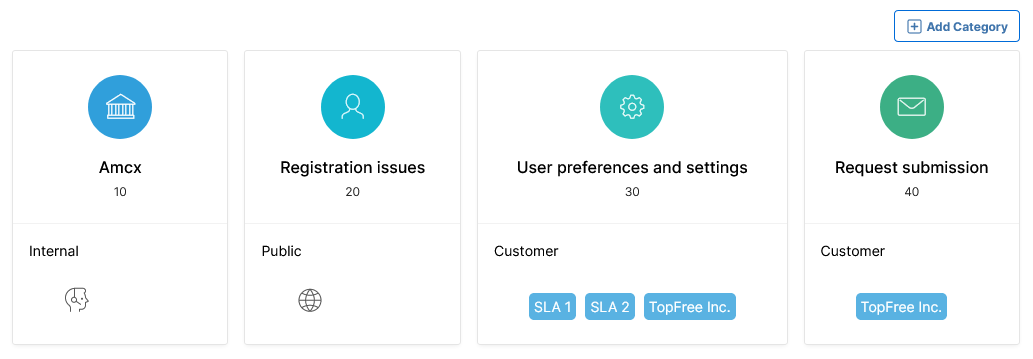
To edit a category, click the category in the list.
To create a new category, click Add Category.
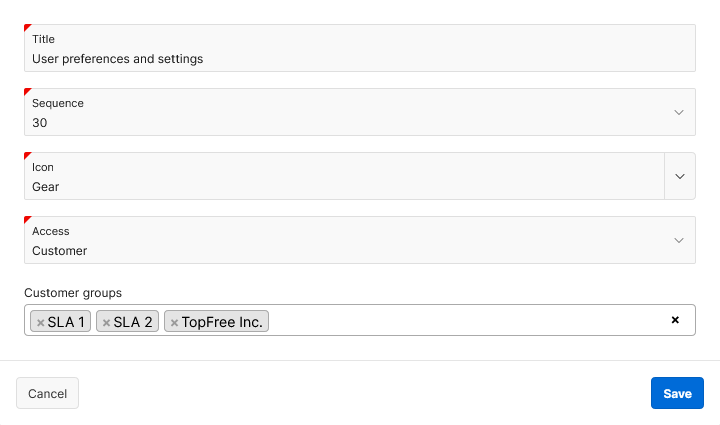
In the Category details section, you can edit the following data:
- Title: Category title
- Sequence: Specifies order number of the Category in knowledgebase
- Icon: Choose the icon that appears along with the category name
- Access: Restrict access to category and its articles:
- Internal: Only internal team members
- Public: All active users, including guest visitors
- Customer: Registered customers from selected groups.
- Customer group: Appears below the Access field, if the Customer is selected:
- Select one or more Customer groups from the list.
Tip
To create Public knowledgebase, you should also enable public access in Settings : Guest access.
To delete a category, click Delete. The button is only available if there are no articles within the category.
Articles
The articles table available in Knowledgebase > Articles represents a list of all knowledgebase articles. You can filter the list and view:
- Published or all articles
- Articles within only one category.
You can also export all articles to a CSV file.
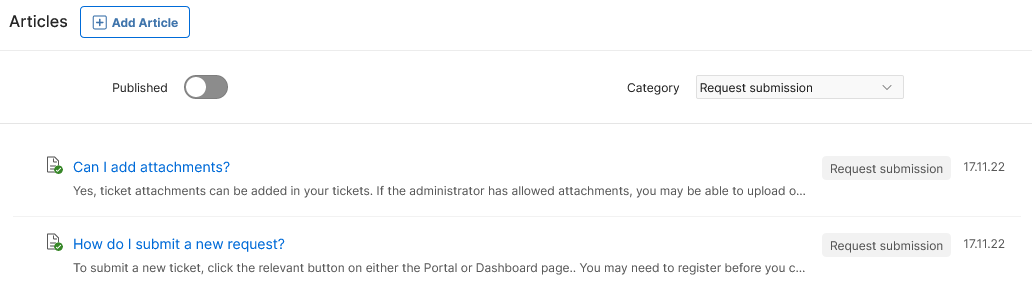
To edit an article, click the article title. To create a new article, click Add Article.
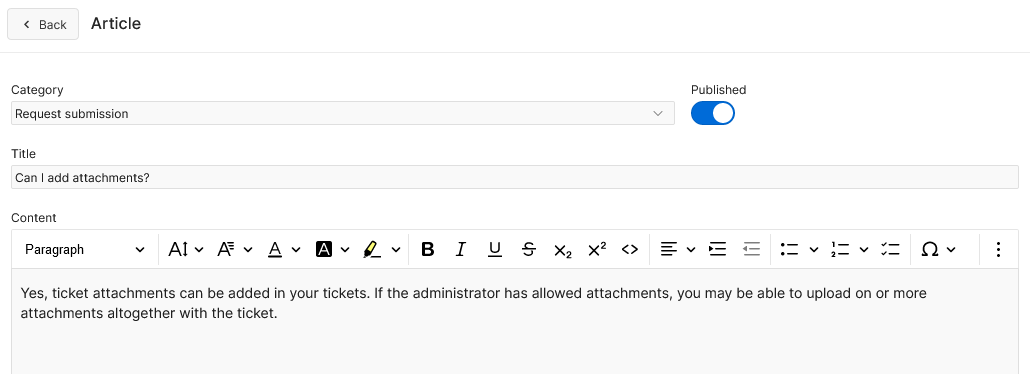
In the Article details section, edit the following data:
- Category - Select a knowledgebase category where the article will be stored
- Published - Checkbox to enable/disable visibility of the article
- Title - The title of the article
- Content - Enter or edit content using the HTML-rich text editor.
To apply the changes, click Save.
To delete the article, click Delete.