Web widget
The web widget allows your customers to get in touch with support team by showing the widget button on selected web pages. Within the widet settings, you can set up the following content and attributes: floating button style, appearance of the widget front menu, availability of the live chat, request submission form, and knowledgebase/FAQ.
After you save the settings, you can see the floating widget button apearing at the right side, and also click the button to check the widget content.
To add the widget to your website, copy the code block and paste into your website pages, right before the </body> tag.
- Code sample:
<script>widget=["acme","s-message","#A11692","--s-widget-bottom"];</script>
<script src="https://sympoq.github.io/widget/widget.js"></script>
The following sections explain the settings of individual web widget attributes.
Floating button style
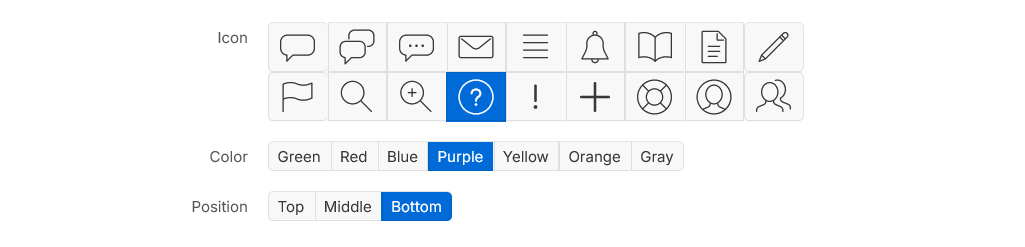
Set the floating button style:
- Icon: Click in front of the icon you want to appears as the floating button
- Color: Choose between several prefedined colors to set the button color
- Position: Select the button position: top, middle or bottom of page.
Front menu
Set the front widget menu:
- Headline: Enter the headine appearing in the widget header, e.g. "
Help Center". - Display logo: Enable or disable logo appearance. The site logo image is set in the Settings > General.
- Text: Enter free text appearing before the widget main menu, e.g. "
Feel free to search through our articles or contact us for any questions."

Chat request
Enable or disable access to public chat from within the web widget.
Submit a request
The request submission takes most of the options set from the Settings > Form. However, you can add additional settings here.
- Enabled: Enable or disable the public request submission.
Info
In order to enable request submission, it also should be enabled in Settings > General, Guest access.
- Option name: Enter the option name appearing in the main menu, e.g. "
Submit a message" - Topic: Choose the default topic appearing in the ticket submission form, or leave "
- All -" - Submission message: Enter the post submission message, e.g. "
Thank you. Your message has been submitted.".
Knowledgebase
The knowledgebase articles takes most of the options set in the Settings > Knowledgebase section.
- Enabled: Enable or disable access to public knowledgebase categories and its articles.
Info
In order to enable the knowledgebase, it also must be enabled in Settings > General, Guest submission.
- Option name: Enter the option name appearing in the main menu, e.g. "
FAQs" - Main category: Select the main/root knowledgebase category, or leave "
- All -".
Click the Save button to submit changes and refresh the widget code, as well as the button appearance and position.