Log a call
Log a Call form allows agents to create requests on behalf of customers and to initiate support process. The issues are commonly based on customer's phone calls.
You can access the form by the "Log a Call" button from the Dashboard (top-left), as well as from the Ticket list and Ticket details page (top-right).
The form contains information similar to the customer's request submission form, and additionally enhanced with information visible to agents only.
To Log a call:
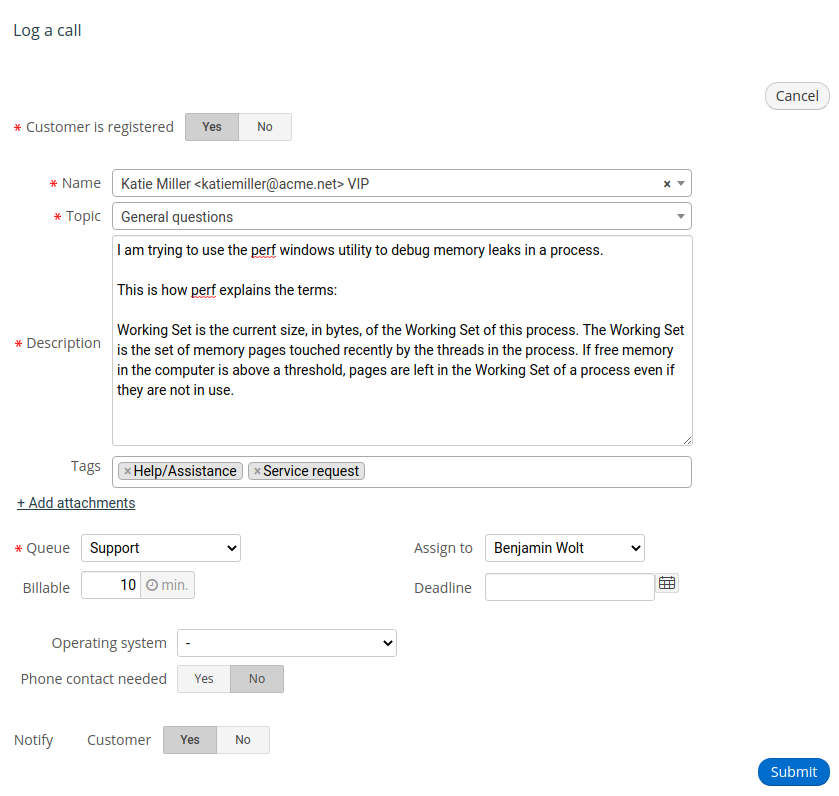
- Select Yes or No depending on whether the Customer is registered or not.
- If the customer is not registered, enter the customer Name and Email address. Note:
- If the customer is registered, search for the customer from the drop-down list.
- Select the Topic. Afterward, the form is reloaded to adjust the following system and custom fields for the selected topic: Subject, Attachment, Priority, Submission fields, and Update fields.
- Enter the Subject. The subject appears only if it's enabled for the selected Topic in Settings > Forms.
- Enter the issue Description.
- Select one or more Tags from the list.
- Optionally Add attachments, if it's enabled for the selected Topic.
- Select Queue from the list. Afterward, the "Assign to" select list is reloaded with the list of named agent that have access permission to the Queue.
- Optionally enter the Billable time (in minutes).
- Select named agent from the list in Assign to field.
- Enter the Deadline in datetime format. If you use the calendar control: select date, hour and minute, and then click the "Close" button.
- Enter values in the custom fields, if enabled for the selected Topic (the fields are set in Settings > Forms.
- Enter the Priority, if enabled for the selected Topic in Settings > Forms.
- Optionally, disable email notifications for the Customer, Agent or Queue Manager. (set by default in Workflow > Automation, Notifications - Agent actions: Log a Call).
Tip
- You can set the value Customer is registered to No even if the customer is registered, and enter their name and email in the corresponding fields. The system will recognize their credentials and update the ticket.
- In the Customer search list, all active Agents are listed and available to select along with customers. In this way, you can use SympoQ as an internal task management software.
Click the Submit button to submit a request.