Ticket Processing
The Processing section under Settings > Ticket processing offers granular control over the ticket processing permissions, ticket identification, email conversion, canned replies, and tagging.
Permissions
Permissions determine who can perform key actions on tickets. Configuration is split into:
- Agent permissions, and
- Customer permissions.
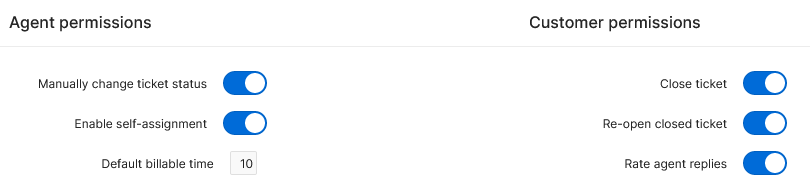
Agent permissions
Click the toggle switch to enable or disable each permission for agents:
- Manually change ticket status: Allow agents to override status within the Comment form.
- Enable self-assignment: Let agents assign tickets to themselves when none is assigned within the Reply form.
- Default billable time: Set a default duration for agent actions. The billable time is used in analytic reports.
Customer permissions
Toggle customer rights to control what end users can do:
- Close ticket: Allow customers to close their own tickets.
- Reopen closed tickets: Let customers reopen tickets they previously closed.
- Rate agent replies: Enable a 1–5 scale rating on responses for reporting on response speed and quality. This represents a scale describing how quickly users receive a response, or how quickly a posted question is answered. The information is used in analytic reporting.
Ticket ID format
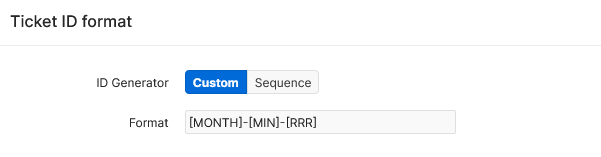
Every ticket gets a unique identifier displayed across your account. Choose one of two formats:
- Custom, using reference codes instead of ID. A reference code is a string of numbers and letters that uniquely identifies a ticket, but isn't assigned sequentially. You can set the reference code format to include information about the time the ticket was created; reference
2025-07-21-FE971is more meaningful than ID24912. You can use the custom ID format that encodes creation date for easier tracking. - Sequence, starting with
[1],[2],[3], and so on. This way you reveal the total number of tickets.
If you choose the Custom format, you can enter the desired ID format as a string of placeholders, surrounded by square brackets. For example, [YEAR]-[MONTH]-[A]-[RRR] would give IDs such as 2026-04-Z-Q9E. Anything outside brackets remains constant in each ID.
Placeholder table
| Placeholder | Result | Example |
|---|---|---|
[A] |
Random letter | W |
[9] |
Random digit | 7 |
[RRR] |
3-chars random alphanumeric string | T4E |
[YEAR] |
Current year as a four-digit number | 2026 |
[MONTH] |
Current month as a two-digit number | 07 |
[DAY] |
Current day as a two-digit number | 21 |
[HOUR] |
Current hour in 24-hour format | 13 |
[MIN] |
Current minute as a two-digit number | 57 |
[SEC] |
Current second as a two-digit number | 44 |
Email to ticket conversion
The inbound addresses available in the Email to ticket conversion section lists every email that feeds into your ticketing system.
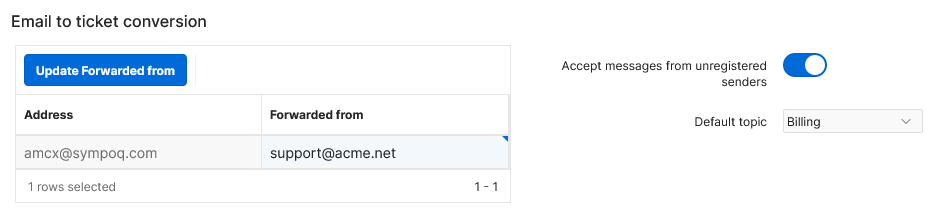
There are two additional parameters available to control the system's behavior once the message arrives:
- Accept messages from unregistered senders: Toggle to allow or block emails from addresses not in your Customers list. If blocked, only messages from Users > Customers list will be allowed.
- Default topic: Assign a topic to new tickets created via email.
Email forwarding
To use your corporate address (e.g., support@acme.net) and forward to the Sympoq incomming address (e.g., acme@sympoq.com),:
-
Configure forwarding in Gmail, Exchange, cPanel, or your email platform:
-
Enter original/forwarded address in the Forwarded from field
- Click Update button.
This way, the Sympoq will recognize your original address and convert each received message into a new ticket or append the reply message to existing ticket.
Note
In case the incoming message contains the Custom submission fields, the Default Topic is overridden by the Form ID from the Conversion placeholders settings. The Form ID can be obtained from the "Conversion placeholders" button in Settings > Forms > Submission forms.
Canned replies
Predefine common responses to expedite replies into the ticket Reply text box, making it easier to respond to requests. Keep canned replies concise and update them quarterly to reflect current reply styles.
To modify the list, click Edit.

To add a new canned reply:
- Click Add Reply.
- Enter the following values:
- Title: shorten description of canned reply. The title appears in - Canned reply - select list.
- Text: the reply content that is loaded into the reply box and modified as required.
- Click Save.
Repeat steps above to add more canned replies.
To delete a canned reply, click the Actions menu icon in front of the value you wish to delete, select Delete Row and click Save.
Ticket tags
The internal tags or labels enable classification and categorization and classification of requests and tickets with one or more keywords. Support agent can classify a ticket using the Tag action in the following actions:
As a result, support agents are able to:
- Search for a specific tag in the ticket list, e.g. "assistance",
- Review the ticket summary report aggregated by tags.
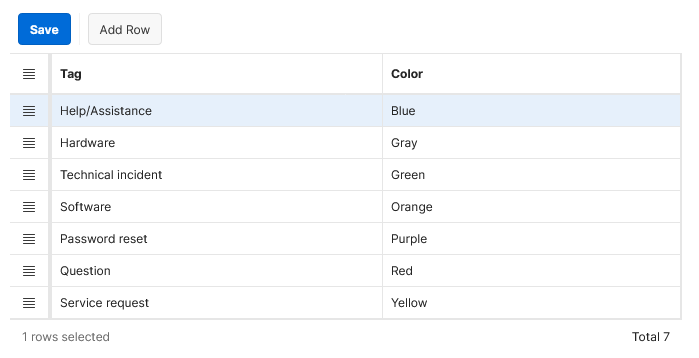
Click Edit to manage tags according to your internal classification scheme.
To add a new tag:
- Click Add Tag
- Enter the following values:
- Tag name
- Color: select the tag style color. You can establish a clear color schema for tags to avoid confusion.
- Click Save.
Repeat steps above to add more tags.
To delete a tag, click the Actions menu icon in front of the value you wish to delete, select Delete Row, and click Save.
Info
The deleted tags remains searchable in ticket list and summary reports.