Import customers
SympoQ provides an easy way to add multiple customers registered in a third-party system to your account. All it takes is submitting a list of customer records and it implements the rest. It also has the option of emailing each customer and providing them with their randomly generated password, or a specified one. It also includes validation to ensure selected usernames and email addresses are not already in use, the usernames are valid and so on.
To begin import customers, go to Users > Customers > Import Customers.
Create and format import file
To create the import file, you can use tools from the third-party system, or crate the file manually.
In case you use the third-party system and its tools, you'll need to select the exact data as needed by the SympoQ import utility described bellow, and then save the file in .csv or .txt file format.
For the manual file creation, you can use any text editor, or an application like Microsoft Office Excel to create CSV (Comma Separated Values) file. Format the file as required and also save the file in .csv or .txt file format.
Each record in the import file represents one customer and supplies the information that will be used to add that customer. Each attribute value is separated by a comma:
Full Name,Username,Password,Email,Company,CountryCode,Region,City,Address,ZIP,Phone,Mobile,External ID
Example:
Sample User,suser,evnT9ix,suser@example.com,My Own Company,FR,Region 1,Lion,Street One,,,,10237
John Doe,johnd@example.com,rrgYxQz,johnd@example.com,ACME Company,US,Region 2,Chicago,Street 12,52270,+1334011254,,99877718
The following rules and restrictions apply:
- Upload up to 100 records in one CSV file
- If you leave the Password field blank, the password will be generated automatically
- For Country Code use ISO 3166-1-alpha-2 code
- The mandatory columns are: Full Name, Username and Email
- Each record must contain 12 commas as data separators, even if the columns are empty
- Make sure there are no empty lines in the file
- If you use Microsoft Excel, do not save file in .xls format. Only the .csv format is supported.
Process import
Afterward the import file is prepared:
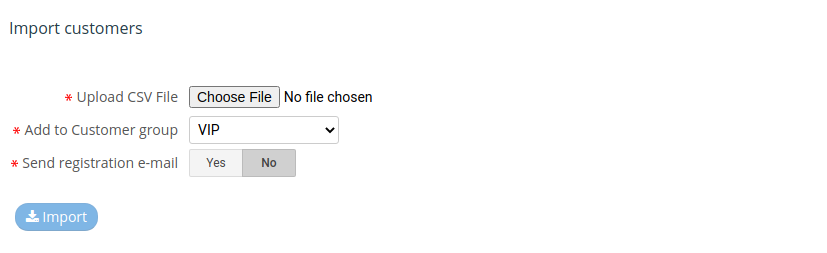
- Click the Browse button near the Upload CSV file field and select the file from the local file system
- Set additional parameters:
- Add to Customer group: select the customer group to which all newly
registered customers will be added - Send registration email: if you choose Yes, the customers you are adding will get the email message with their login credentials using the User registration message email template
- Add to Customer group: select the customer group to which all newly
- Click the Import button.
Warning
If the import fails (the message "0 customers imported" appears on import), check the file on rules and restrictions above, especially the rules 1., 4., 5., 6. and 7., and then repeat the import.